

 Back in 2007 we bought our house from a local builder and got to make numerous choices, but the basic house design was fairly set and didn't allow for many changes. This means that our house has very little built-in "character".
The good part about that is that we got to create our own "character" as the years went on, but the bad part is that it sometimes takes a decade to make my visions come to life. Some stuff was easy, like having the builder agree to do wainscotting throughout the main floor or adding a simple pressed tin backsplash instead of learning how to lay tile. But some things seemed easy and instead became a project… like my mantle I had been dreaming of since we first moved in. 
Our design dilemmas:
- The wainscotting that I needed to have and wrote into the purchase agreement. I still love it, but it does add some design dilemmas I hadn't anticipated, especially if we wanted to do a fireplace surround and not just a mantle.
- In our house design, the builder added inset boxes above and to the sides of our fireplace, and while I love these for displaying pictures and for giving room to hang the TV, it visually adds a cluttered feel because there is so much going on in one small space.
- The granite tile around the gas insert that make the fireplace much larger than it appears. At 60 inches across, it meant that many of the pre-fab mantles were far too small for our space, which meant we had to do a custom mantle or make our own. We were ideally looking for something that was at least 70 inches, if not bigger, and those are really hard to come by pre-fab.
- This large size meant that everything was much more expensive than I had thought it would be, especially if we were trying to match the house trim and go with a more formal look. If we wanted a fireplace surround, the price jumped up even higher.
- The rounded corners that the builder added are great and all, but they make decorating seriously difficult, including simple things like painting. Do you go to the actual corner, halfway-ish on the round part, or do you do your own line that doesn't compete with the rounded design? In our mantle's case, do you go flush to the cutout TV shelf and always see that rounded edge it meets with, or do you go slightly higher or lower to accommodate?
Our solutions:
We decided that buying our dream mantle didn't make financial sense right now, so instead of waiting another decade, we went for a rather ho-hum mantle shelf I got for a steal on Amazon. Side note: who would have thought you could order a mantle on Amazon for under $100??
We ended up needing to sand our mantle shelf a bit to sit flush to our wall, so that was our first hang-up. That's why I keep this guy around. I would have never noticed that the shelf wouldn't lay correctly on the sheet rock until the actual mounting process. He noticed immediately.  Here's a better picture of the inside of the mantle shelf we bought. Yes, we *might* have written our names and drawn pictures inside the mantle. Because, why not?

Once it was sanded and we all signed our work, we then measured {twice} and screwed in the included mounting bar to the wall. Then screwed that into the shelf and we finally had a mantle!  But, that all just got us a rather plain mantle, so we set about making it ours. We started by brainstorming ways to add some drama to the mantle shelf and started shopping for corbels, trim, whatever we could think of. Everything we tried was too long, or too thick, or just plain the wrong style. We went to too many hardware, salvage, and home improvement stores and hung out in the trim aisle for hours before we got discouraged and started looking elsewhere for inspiration.
  We ended up going with corner pieces like you would use in crown molding that is corbel-like, but not as busy as a traditional corbel. The were basically just a box with a fancy trimmed bottom, so I had thought I would need to add trim to it, but once it was up I actually ended up loving the simple and plain look with the rest of the mantle pieces. You can find a similar one on Amazon.
  After we had that set, we simply got a piece of crown molding and trimmed it to fit under the mantle shelf in between our two corner pieces we are using as corbels. This adds height to our mantle and makes it look less like a wall shelf and more like an original built in piece. The side pieces being plainer than traditional corbels {and also less tall} fit well in our space without making the mantle too Victorian-era for the rest of the house.
  Here's a close up of the trim so you can see all the details.
 And, here's the side view.
  And, a view of the right hand side so you can see the trim work. As you can see, the "corbels" we used just barely worked. Even a centimeter bigger and they would have hung too far into the fireplace opening.
  After the mantle shelf and trim were up, I convinced my brother in law to come over and professionally paint it for me.
  After it was all painted, the result is the mantle I had always wanted at a fraction of the cost of custom work, and we still got to customize it how we wanted.
  While I would have loved a fireplace surround, my main goal was to get something the stockings could hang off and we could decorate with the seasons. This mantle got us both of those, as well as making the living room look a whole lot more put together.
 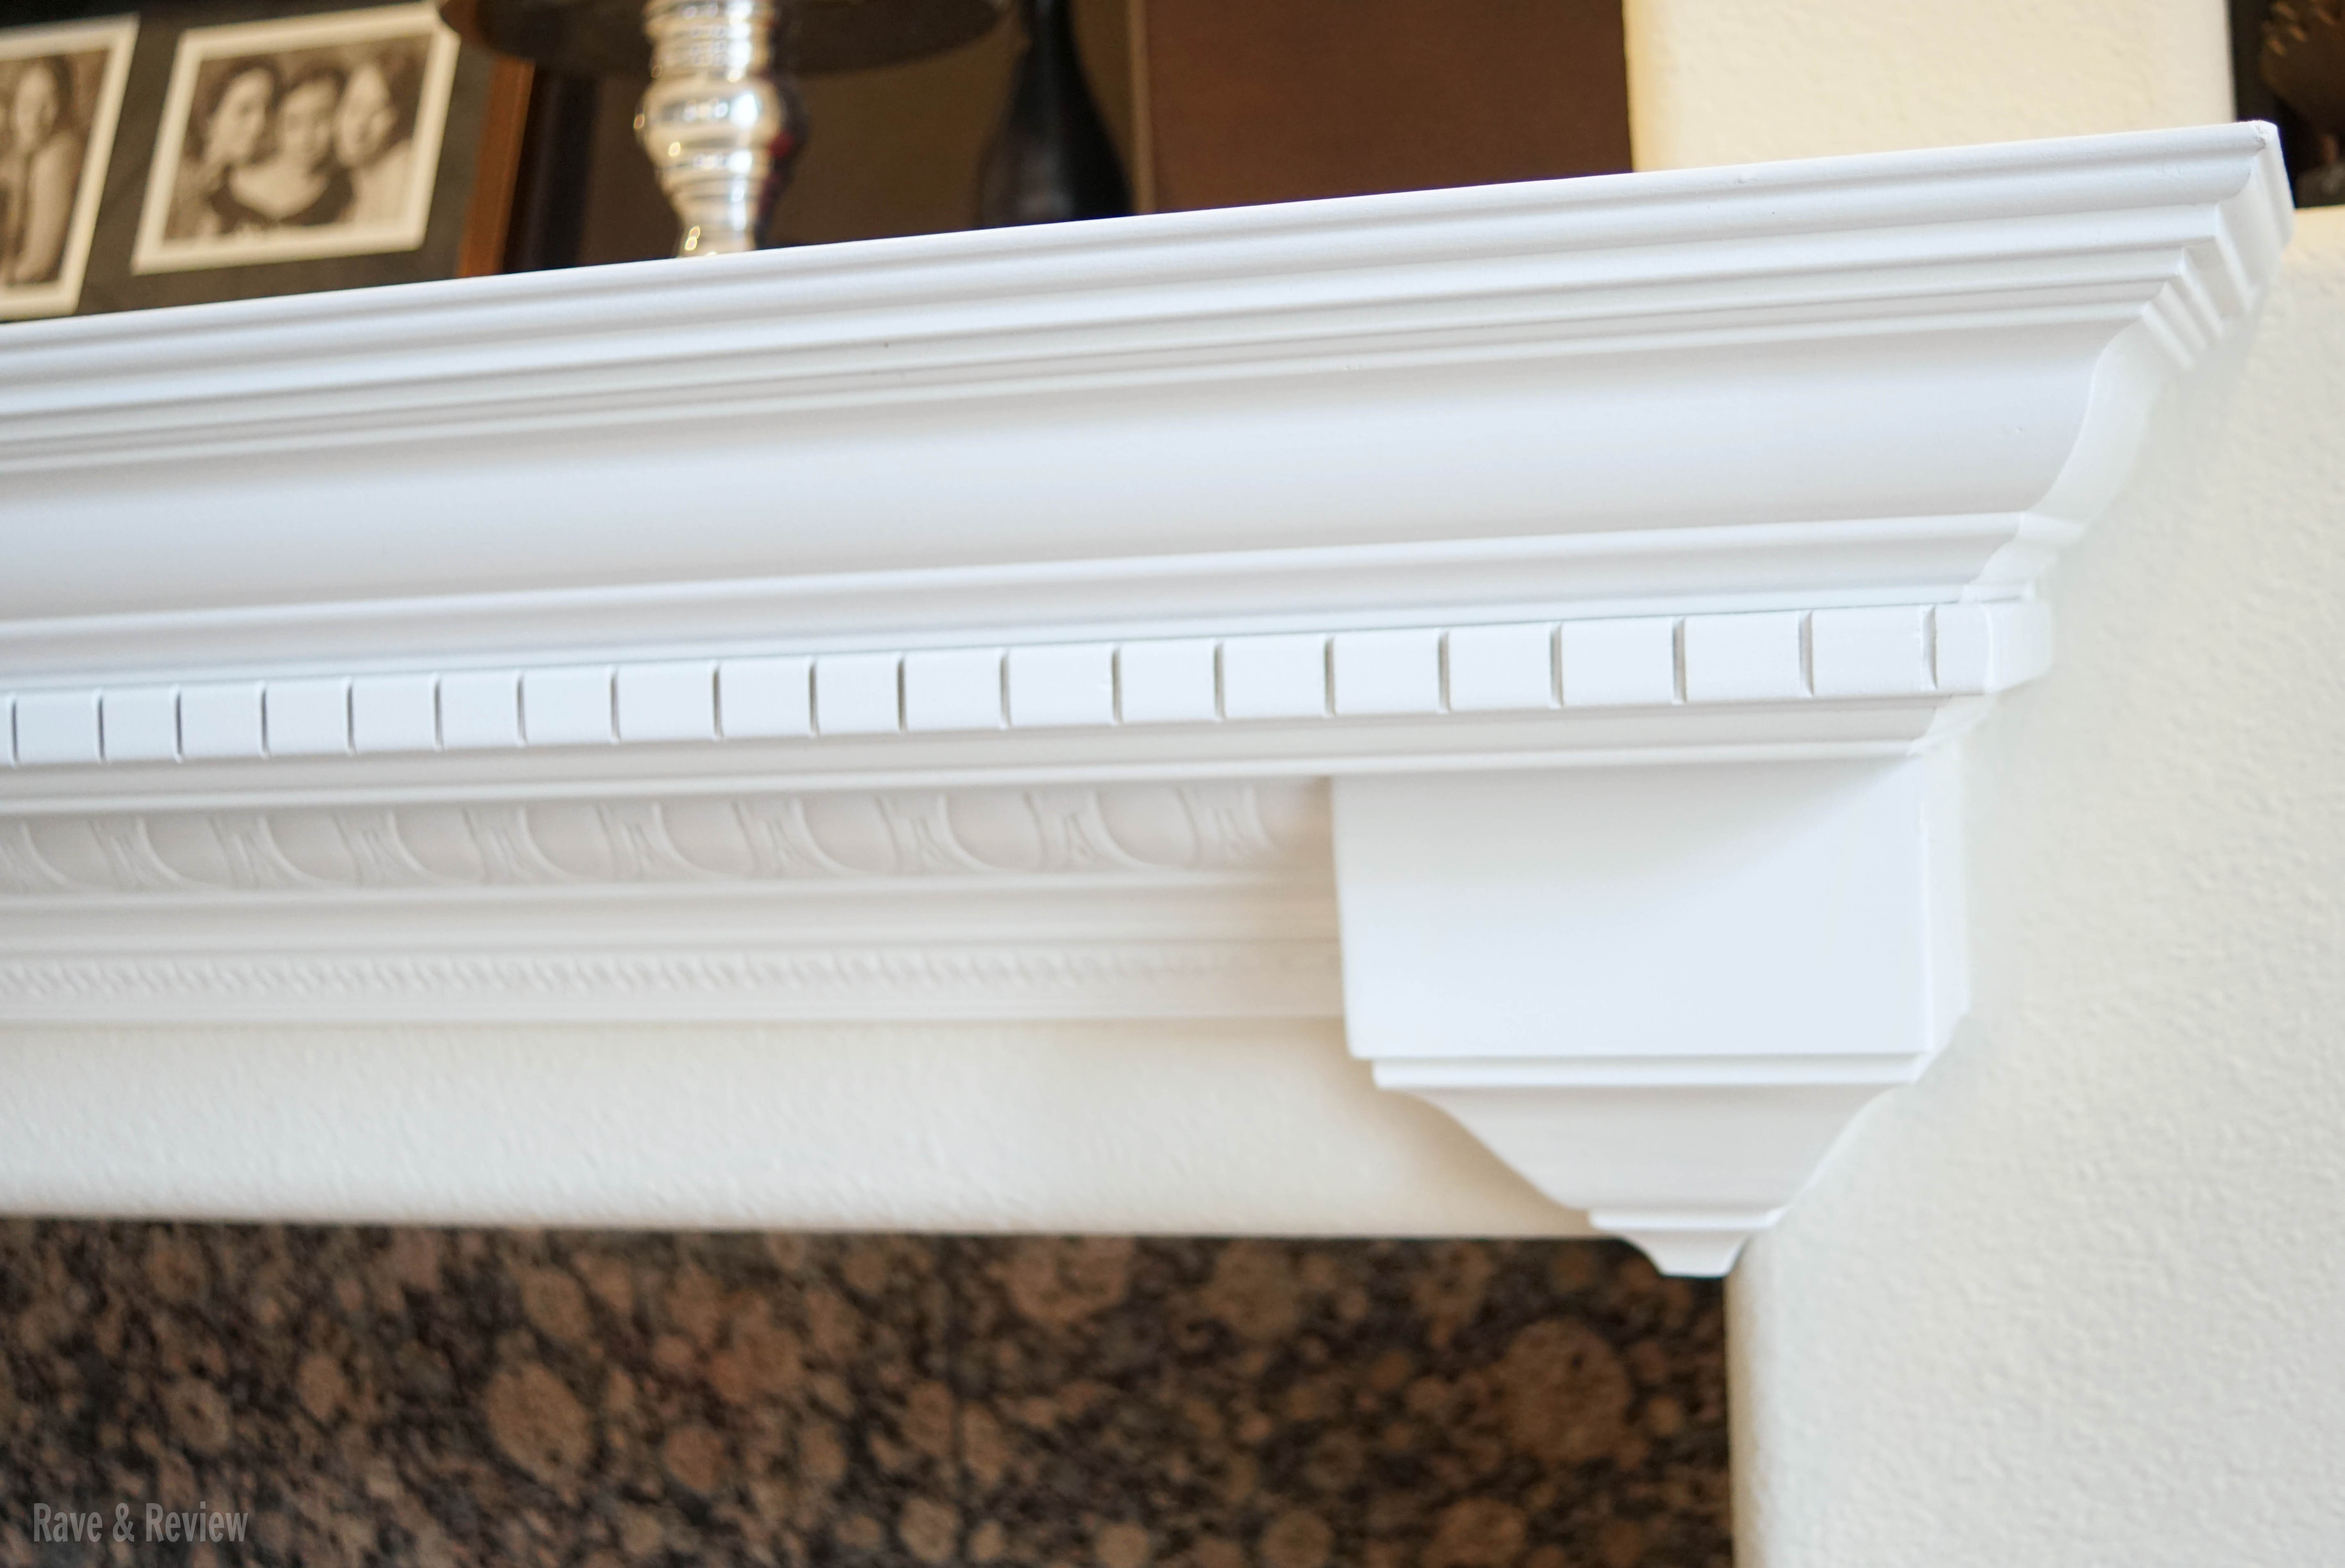 And, while the unpainted mantle trim looked a bit busy for my taste, the painted version softened it up quite a bit and I love that we went with a more ornate look now.
 The completed mantle also inspired me to finally finish sewing the red stripe on our curtains {to lengthen them to floor length since our ceilings are super tall}, buy some grown up decorations, and generally kick the kids toys out. They still convinced me to keep the kids table to the right side of the fireplace and the rocking horse my grandpa made can't be kicked out yet, but for the most part the kids' stuff is out of the living room… and it is glorious.
So, how much did we spend on this mantle redo? Around $150 for everything {which doesn't include paint because we already had that on hand}. Not too shabby, right?
What a beautiful addition to your fireplace area! It looks really nice!
What a nice looking mantle! You did a great job! Such a great idea doing this yourself and saving money.
This looks beautiful in your home.
That turned out beautiful. I love that you included your initials inside, it’s a sweet secret touch.
That is very beautiful! I like how it turned out. I will definitely keep this in mind when I decide to do mine.
Looks so nice! I love this idea.
The Custom Wood mantel fireplace really makes your fireplace stand out! I really like it.